

How To Repair Trailer Boards Popping Up
Exercise you have a pop up camper with a water damaged roof? Unfortunately, the roof of the camper we bought was beyond repair and rotting away. We figured out how to fix it by removing all of the h2o damaged wood, then rebuilding the roof structure and reattaching the aluminum peel.
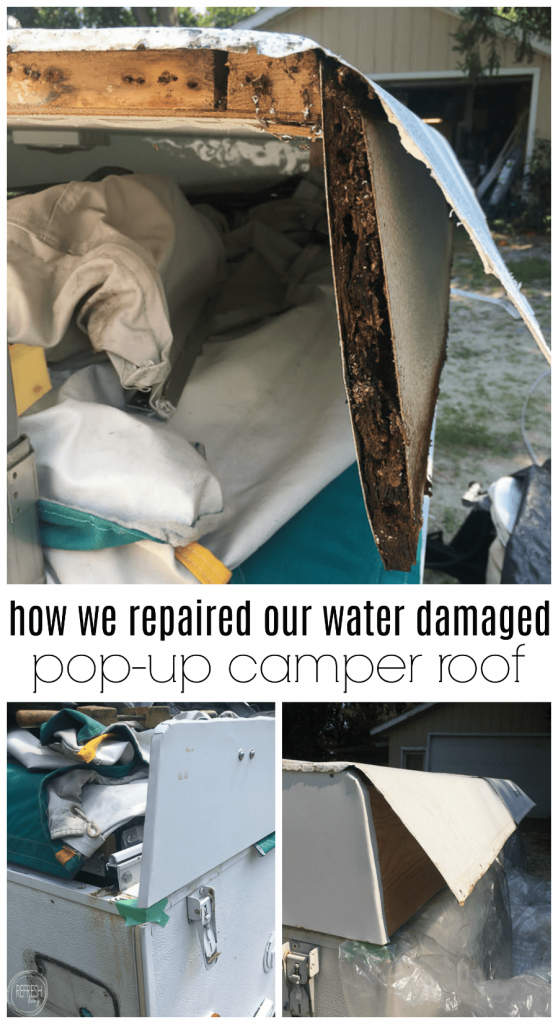
When we purchased our 1993 pop-up camper, I knew there was water damage to the roof. What I didn't know, however, was how extensive the damage actually was. We were able to rebuild the roof and now have a like-new camper, but the amount of time it took to complete made it quite the projection.
Subsequently figuring out how bad the impairment was on our camper, I searched the net for videos and posts on how to set water damaged roofs, and although I constitute some helpful videos, I struggled finding detailed posts that walked through the procedure on how to completely rebuild parts of the roof. Hopefully this mail will be helpful for others that discover themselves overwhelmed by the procedure of fixing a rotting roof on a camper like I did!
Function one: Removing the Pop Up Camper Roof and Assessing the Water Harm (you are here)
- Remove the Exterior Trim to Appraise Damage
- Detach the Canvas and Remove the Roof
- Remove Rotted and H2o Damaged Wood
Part two: Rebuilding/Repairing the Roof and Making it Water Tight
- Rebuild Roof Construction with New Forest
- Reattach Roof and Canvas to Camper
- Seal Up Holes and Seams to Prevent Time to come Leaks
- Cosmetically Repair the Ceiling
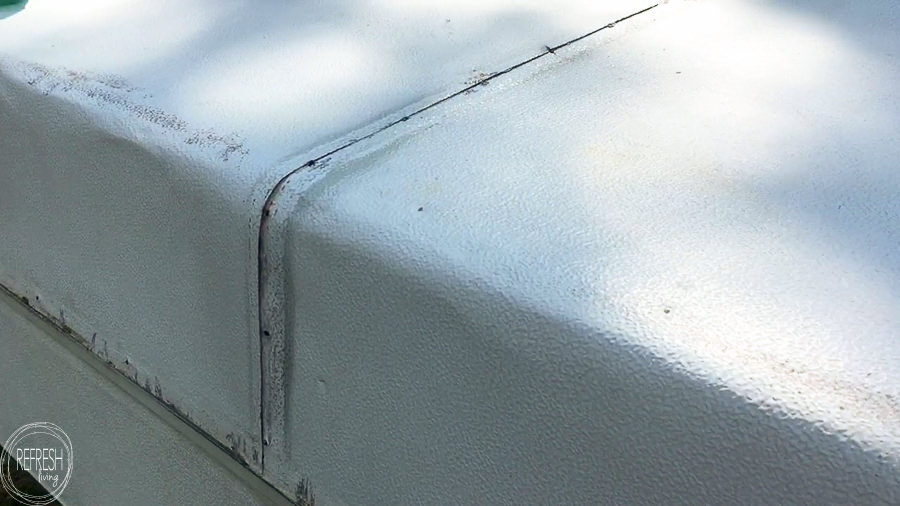
Remove the Outside Trim to Assess Harm
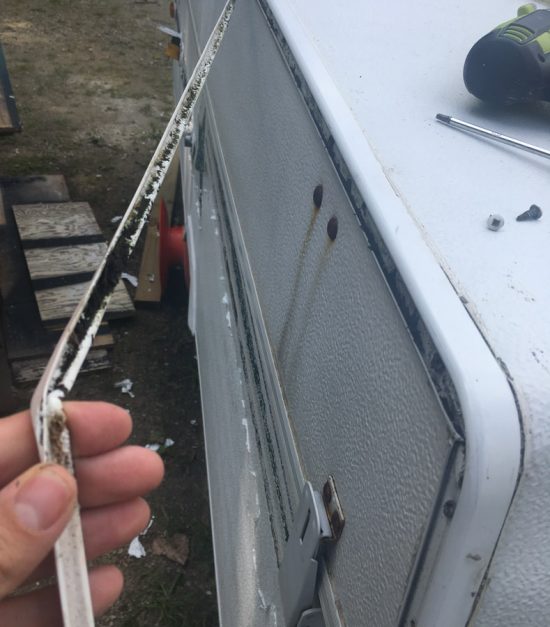
In gild to unscrew the trim, the offset step is to take out the vinyl trim insert that covers the screws. If your camper looks anything like mine, the vinyl trim is probably cracked, broken, moldy, or all of the above. This trim should just pop out equally you pull on it.
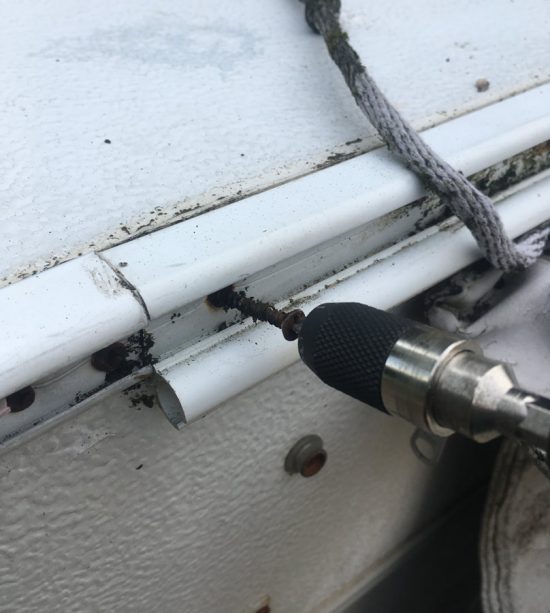
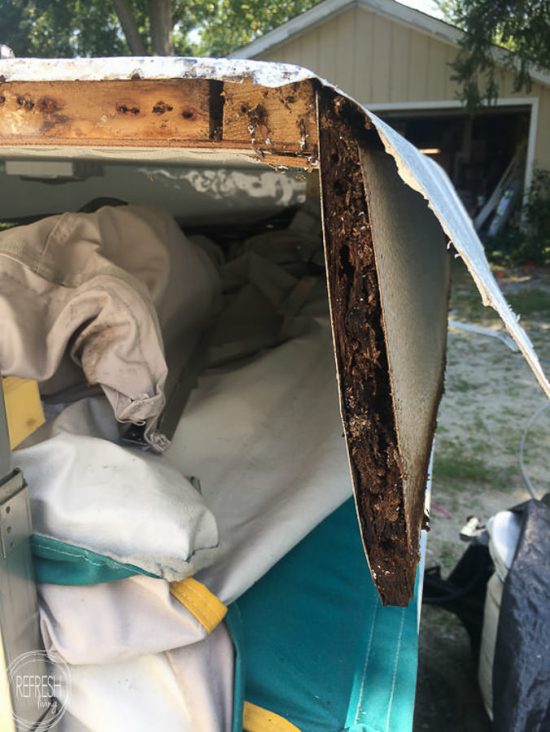
Then, it'southward time to remove the screws. As I was taking out the screws, this gave me a good idea of where the water damage was on the camper. Some of the screws came out rusted, and in some cases, completely rotted away, which signaled that area of forest was probably rotting away as well.
For the screws that were completed rotted, the screwdriver evidently didn't have annihilation to grab on to, so I ended upward using a combination of a pry bar, pliers, and some swearing to get the screw pieces out.
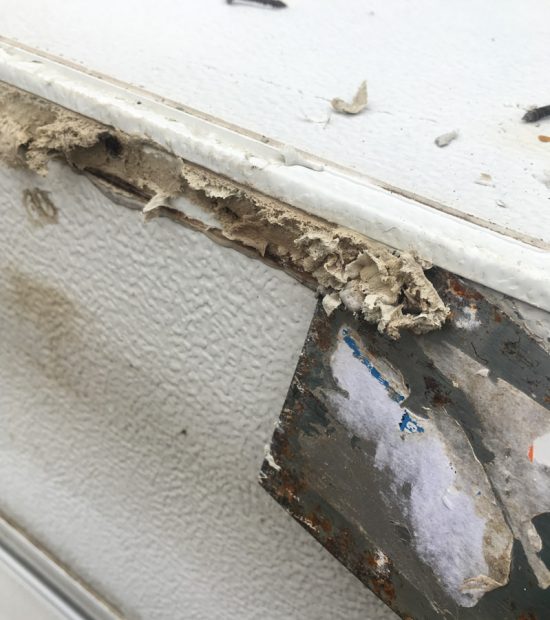
After all of the screws were removed, I used a metal putty knife/scraper to remove all the old, gunky, pasty butyl record. This procedure was tedious, to say the least. After nearly of the putty tape was removed, I used mineral spirits and a fine mesh steel wool to remove the backlog gunk.
At this point, you can easily lift up the skin to see the condition of the forest of the roof. As I unscrewed the trim screws, some of our camper roof merely started falling apart because the whole perimeter, and most of the pinnacle frame, was rotting abroad.
You tin become a better view of the amount of water harm in this video. I have the finished camper reveal, equally well as the other steps in my roof rebuild process, over on my You Tube aqueduct. I'd love for you to head on over, bank check them out, and even subscribe if yous'd similar to see other popular-up camper projects in the future!
Detach the Canvas and Remove the Roof
If you find, like nosotros did, that you'll need to replace a good corporeality of the wood on your pop up roof, it'southward time to detach the canvas so remove the roof in order to rebuild it. If your h2o damage is minimal and the wood is still structurally sound, y'all might be able to skip ahead to Part 2 – Seal Up the Roof to Prevent Future Water Impairment.
Obviously, there was not a chance we could salvage some of the wood on our roof, so nosotros set up up our programme to rebuild information technology, which required us to remove the roof.
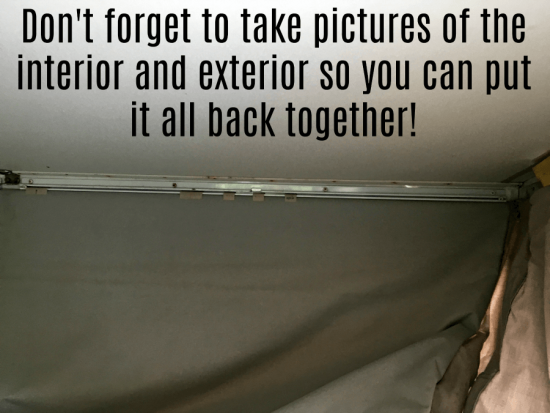
First, we unscrewed the canvass from the within of the camper. Basically, the canvas is attached to metal strips that are and then screwed into the sides of the roof. I made sure to take pictures of the brackets around the entire inside perimeter of the roof so when information technology was time to put everything dorsum together, I had a visual model to help me.
After the sheet was discrete, I unscrewed the 4 lifting brackets from the sides of the roof frame. Ours were attached with bolts and nuts on the inside of the camper, so they were easy to remove. We used two x 4s to hold the roof in place while we detached the other lifting brackets.
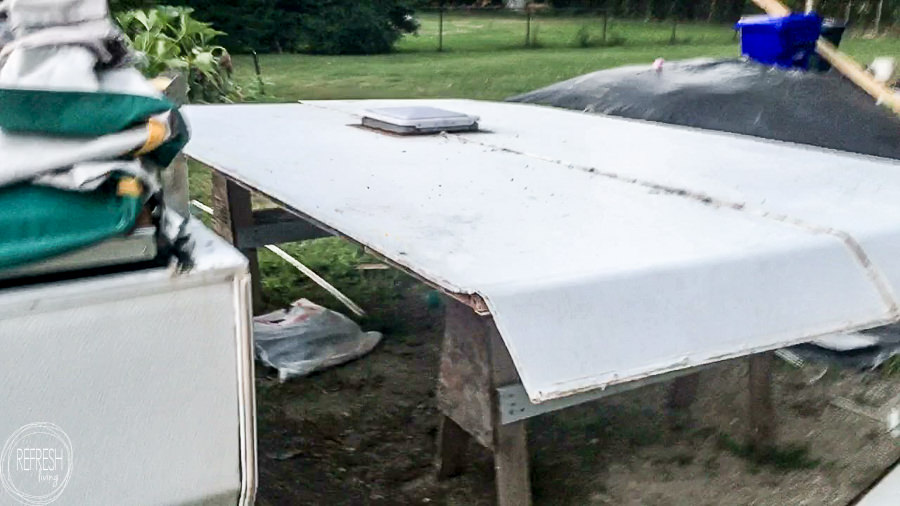
After everything was asunder from the main body of the camper, nosotros took off the roof and put it on meridian of 2 sawhorses right next to the camper.
For a better look at our deconstructed roof, sentry the video beneath.
Remove Rotted and Water Damaged Forest
In the video above, you lot probably saw just how rotted abroad some of the wood on our camper was. This affair had clearly been taking a lot of water for a long time. We opted to completely remove all four sides of our roof, too as replace the exterior edge of 1 x ii″ framing.
At this point, if the water damage is all-encompassing enough, you have the option of completely removing the skin, the foam, and all of the framing lumber and rebuilding information technology from scratch. (If you need to go this route to rebuild your roof, I'd recommend checking out The Pop Up Princess, and they but rebuilt a pop up camper roof and decided to replace everything.)
If I had remembered to have a picture of the roof turned upside downwardly before we started to repair it, here'south what it would accept looked like.
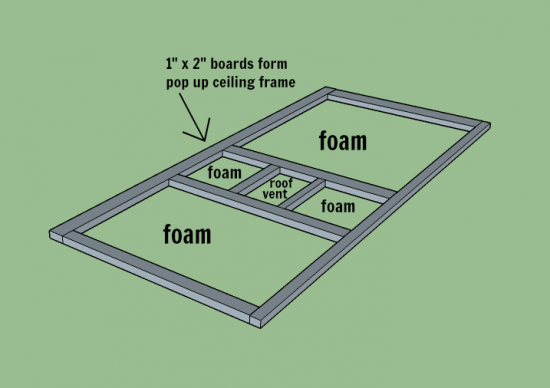
Nosotros decided that instead of completely taking autonomously the entire roof and replacing all the cream and framing, we would simply replace the pieces of wood that had taken water and were no longer structurally sound. In the video, I mentioned that we thought we were going to keep some of the 1 x 2″ frame, but instead we decided to just supersede all the 1 x 2s forth the edge. Thankfully, we didn't need to replace the interior 1 x ii″ frame, and therefore we could keep the peel and foam attached.
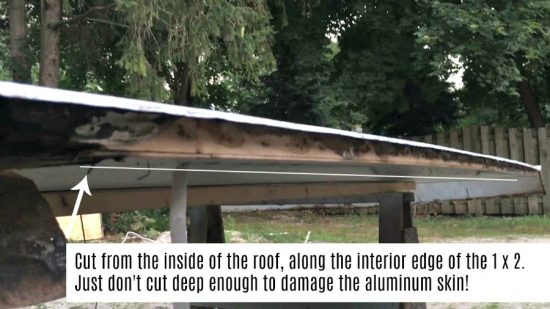
To remove the 1 x 2 pieces that were still attached, I used a small, 4-1/2″ compact circular saw to cut from the bottom right along the edge of the ane 10 two. The only thing that was property those pieces in place was that the interior ceiling was still attached to them. It's important to make sure you don't saw deep plenty to go right through the aluminum skin! This will add together a lot more work to repair the skin in gild to keep out those h2o leaks.
More than on how we rebuilt the roof frame and sides in the next stride, which you'll find in the 2nd postal service in this series.
Part 2: Steps to Repair and Rebuild a Water Damaged Pop Up Camper Roof and Make information technology H2o Tight
Like it? Pin It. (Thank you!)
You lot can find all of my other pop upwards camper remodel projects here.
Like what yous see? I'd love for you to follow forth!

Sharing at these crawly weekly parties!

Join the Refresh Living DIY & Upcycling Community
Bring together the subscriber list to receive one to ii emails per month with updates from the blog. PLUS, you'll gain access to my printables and graphics library. Every new pattern I create will be added hither, and you'll have free admission - forever!
Virtual high five! You're i step away; just check your email to confirm your subscription.

How To Repair Trailer Boards Popping Up,
Source: https://refreshliving.us/how-to-rebuild-a-pop-up-camper-roof-1/
Posted by: harriswhosto.blogspot.com
0 Response to "How To Repair Trailer Boards Popping Up"
Post a Comment