

How To Install Mysql Workbench In Ubuntu 18.04 Using Terminal
Introduction
MySQL Workbench is a unified visual tool for database management. Its graphical interface provides database architects and administrators with an easier style to model information, build and run SQL queries, and maintain a database.
In this tutorial, you will larn how to install, configure, and go started withMySQL Workbench on Ubuntu (xviii.04 or xx.04).

Prerequisites
- An Ubuntu 18.04 or xx.04 Linux system
- Access to a control-line/terminal window (Ctrl+Alt+T)
- A user account with sudo privileges
- A MySQL server (as Workbench is designed to work with MySQL databases)
Installing MySQL Workbench on Ubuntu
MySQL Workbench is very easy to install and available in the local repository or through deb packages.
Decide which options is all-time for you and follow the steps in outlined below.
Installing MySQL Workbench Using the Apt Repository
The simplest manner to install MySQL Workbench is to use the local apt repository. The simply thing you need to do is download the package.
As a rule, e'er update and upgrade the system, before whatever installation:
sudo apt update && sudo apt upgrade At present y'all can download and install Workbench with the control:
sudo apt install mysql-workbench Installing MySQL Workbench Using Deb Packages
To install MySQL Workbench from the official apt repository, use the deb package from MySQL archives.
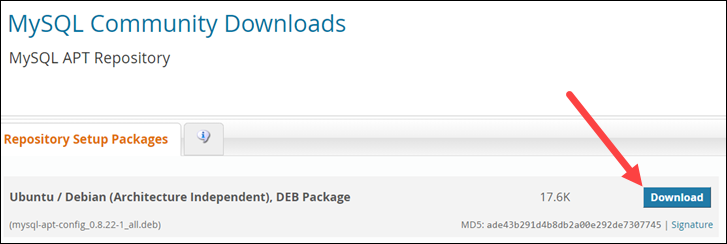
1. Start by navigating to MySQL APT Repository download page and click Download to save the deb package on your Ubuntu system.
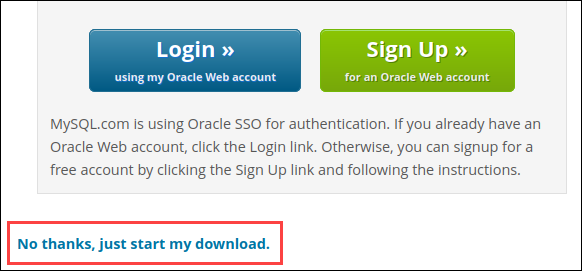
2. Before the download starts, MySQL suggests to login or sign up for an Oracle Web account. To skip signing in for a free account, click No thanks, just start my download.
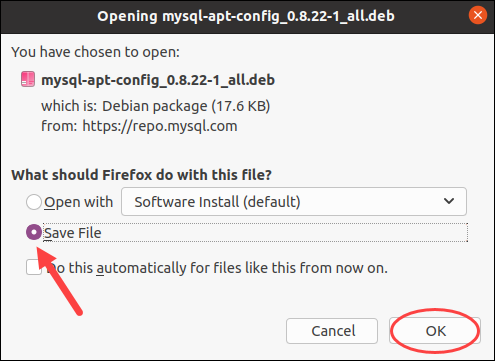
3. When the dialogue box appears, select the Salvage file option and click Ok.
iv. Look for the download to complete. Then, open up a final window (Ctrl + Alt + t) to add the MySQL apt repository.
5. In most cases, the saved file will be located in the Downloads folder. To verify its location, navigate to Downloads and list the content of the directory:
cd Downloads ls 
6. Next, add together the official MySQL repository to the apt source list by running the command:
sudo apt install ./mysql-apt-config_0.8.22-1_all.deb Note: The name of the deb file may differ if y'all downloaded a dissimilar version of mysql-apt-config. Modify the version number in the command above, if needed.
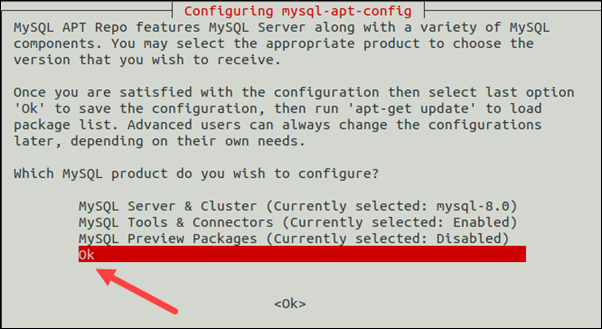
7. A pop-upward window appears request which MySQL product to install. Equally the required product is preselected, coil down to Ok and hit Enter to continue installing.
8. Look for the installation to complete.

10. Then, update the apt cache to add the new repository source:
sudo apt update 11. Finally, install MySQL Workbench by running:
sudo apt install mysql-workbench-community 12. Press y when asked to confirm the installation and expect for the process to complete.
Launch MySQL Workbench
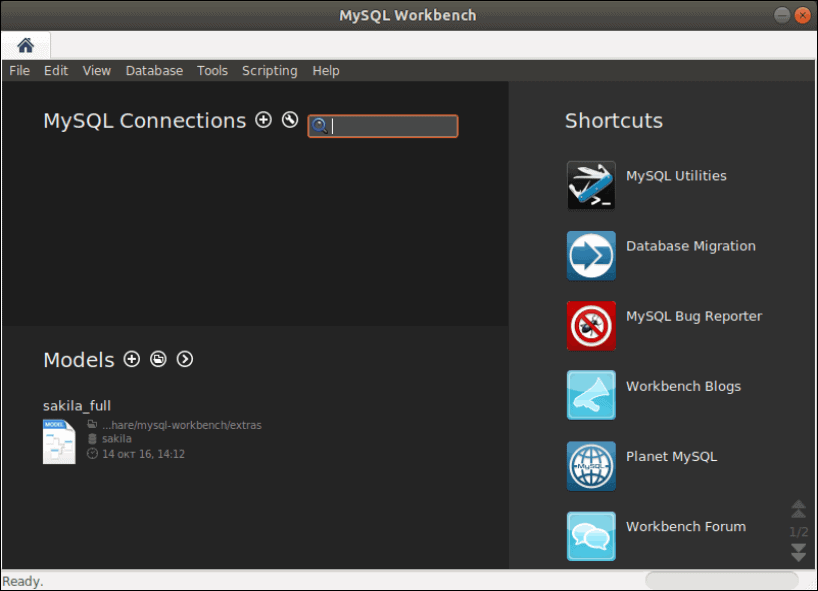
Once you have installed the software, launch the database management tool:
mysql-workbench The control prompts Workbench to launch and a new window will announced.
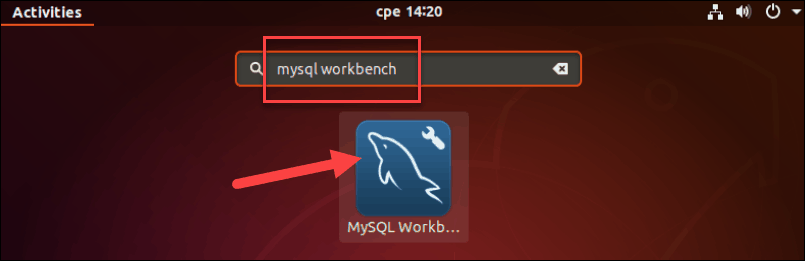
If y'all adopt using the GUI, launch Workbench by searching for it in the Activities carte du jour and clicking on the icon as seen below.
Configure MySQL Workbench
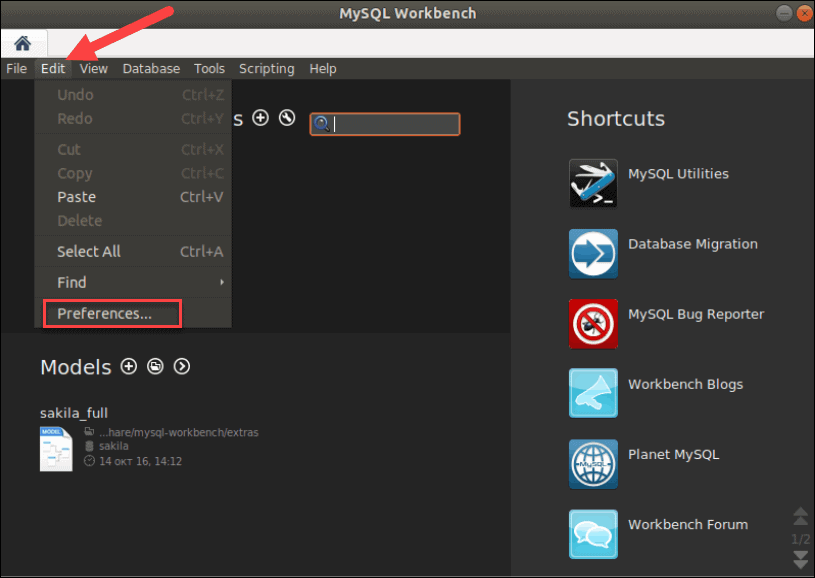
Before you start managing databases, you may desire to alter the default settings. To do and then, open the Edit drop-down menu and select Preferences.
The Workbench Preferences window appears, consisting of several sections:
- General Editors
- SQL Editor
- Administration
- Modeling
- Fonts & Colors
- Others
Click through the tiles, inspect all the options, and adjust them to fit your needs.
Uninstall MySQL Workbench
To remove or uninstall MySQL Workbench on an Ubuntu system, use the command:
sudo apt remove mysql-workbench Conclusion
With the aid of this article, you should now know how to install MySQL Workbench on Ubuntu from the apt repository or the official deb parcel. You also learned how to configure and uninstall the software.
The next thing to learn is how to create a database with MySQL Workbench.
Was this commodity helpful?
Yes No

Source: https://phoenixnap.com/kb/mysql-workbench-ubuntu
Posted by: harriswhosto.blogspot.com
0 Response to "How To Install Mysql Workbench In Ubuntu 18.04 Using Terminal"
Post a Comment